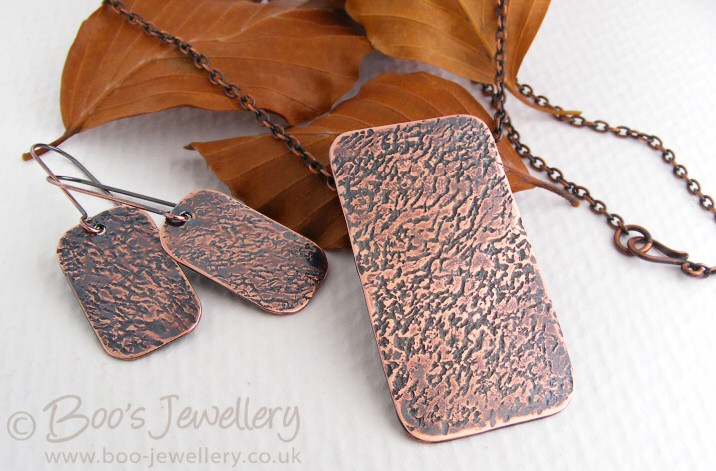
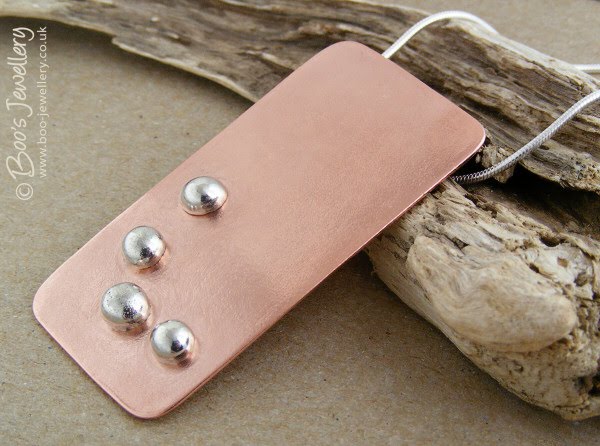
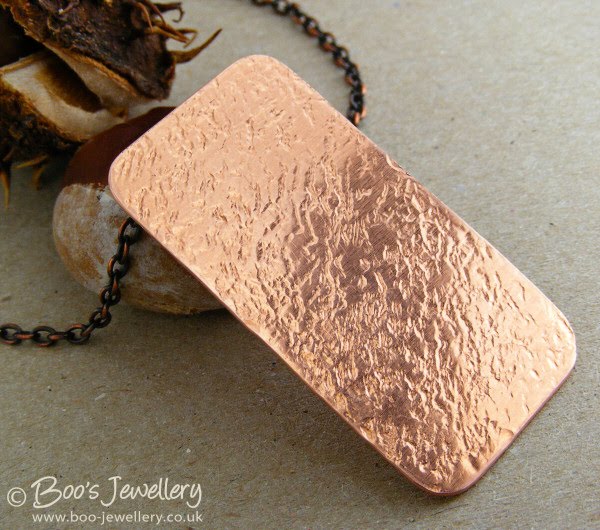
In my previous blog post, I’d shown some new pendant designs using sheet copper, where in the past I’d worked largely with wire based designs. My intention, when stocking up on sheet, before I got distracted with some other ideas, was to set up to do some etching. I’d been accumulating the necessary materials over time and working out the methodology and designs in my mind and sketchbook.
I had in mind that I wanted to combine my love for photography and an extensive portfolio of available images with my jewellery making. It was my idea to take suitable photographs and put them into a stylised monochrome format in order to etch these into copper sheet and finish by oxidising to bring out the texture of the image. I had several images in mind that I thought would prove suitable and had been in my minds eye for some time. All of the designs I’ve made thus far have been based on a photograph I took, albeit some of them have ended up very abstract and not obviously image based at all. But this way I know that they’re unique and original.

I’ve always loved daisies and the first image I intended to try etching was one of my daisy photos. This is just a standard lawn daisy photographed in the grass outside my front door. I don’t like cutting the grass and getting rid of them, so often leave particularly abundant patches of them to grow unhindered.
I hoped that this particular image had enough contrast and detail that it would be self-evident in a very simplified form and set to work to improve the contrast, reduce the colours of the image and retouch it into a very much stylised graphic format, as shown.

The etching method I’d decided some time ago to work with was one using a pure and saturated salt solution in combination with an electric current from a battery holder. I liked the simplicity of working with household chemicals and whilst it does produce a potentially dangerous solution of copper salts that will need careful disposal, the process itself is pretty innoccuous and I was happy that I could work comfortably with the materials within my domestic work space.
The process necessitates putting the image onto the meticulously prepared (i.e. smooth and very clean) metal surface as a resist – something that will mask the copper where you don’t want it etching and leaving spaces where you do want to eat away at the surface. Consequently, the image needs to be worked in negative (and mirrorred), to give rise to the image the correct way round once appearing on the sheet metal surface. Hence my daisy image has been reversed.
As with many jewellery making techniques, meticulous preparation is at the heart of the eventual success – the results are directly proportional to the care taken setting it up – cut corners and you cut quality. And like many techniques, the core of the work is in the preparation, the process itself is relatively easy, but getting to that stage is where the effort lies.
And like many techniques, the methodology often needs fine tuning and honing as you work. It’s all very good working from a tutorial – and this one was detailed and extensive – but there’s no substitute for hands-on experience and practical problem solving – something you can only really do for yourself. So I knew as I set off to produce my first item that the initial results would not be perfect, in fact, I was lined up for a total fail, as others had said they hadn’t done well with this particular technique.
 The first etched incarnation of the daisy, which is softer and more granular than I’d intended, but still significantly better than I was expecting.
But despite not working with the ideal materials (I was missing something that I hoped wasn’t going to be a deal breaker) and improvising a little, my first etch was better than I’d dared hope. The image had obviously transferred to the metal (using a laser printed original and heat) – which was actually the area where I was improvising and crossing my fingers – and the etch had happened as predicted.
It’s funny how past experience continues to inform current work. As a technical illustrator specialising in airbrush work, a technique I often used to transfer line illustrations to board to airbrush them, was to photocopy them and then iron this onto the art board, so I’d already settled on this as a potential transfer method.

 From a long time in my past, some technical airbrush illustrations. The top one is the front suspension of an Aston Martin Vantage – which Aston Martin helped me with, I took measurements and reference photographs directly from parts on their shop floor. The second one is an SME tone arm – it resides on our turntable.
Where my print had missed in places, I’d patched it in with Sharpie, one of the recommended techniques, but that proved to be insufficiently resilient and gradually lifted during the etch and left holes in the design which then started to etch too. So the result was a little soft around the edges and had quite a lot of background noise where it should have been clean – see the photo above of the finished pendant.
On subsequent etches I used a metallic Sharpie and that was rather better – nail polish was better still, but hard to apply in small amounts. It was evident that the quality of the transfer of the design to the metal was the really vital stage. It’s also vital to cover all of the metal you submerge as anything not protected will etch. I also learned that any duct tape used to cover edges etc. needs to be burnished down tightly, any place where a droplet of etching solution can get inside will also etch.
Digging around on line for methods of transferring my images to the sheet metal (I was trying to avoid the delay and expense of getting some printed circuit board transfer paper, the recommended technique) I found a post in a model makers forum for making printed circuit boards where I think this chap had stumbled upon something that worked, by accident and so I decided it was worth a try as I did have the materials to hand. His recommendation was to use the laser printer, but print onto glossy inkjet photo paper. The glossy coating sticks to the toner too, making the transfer much thicker and with more distinct edges and when done, it lifts off relatively easily after soaking in some nail polish remover (I tried every solvent in the house before I made this particular discovery).
 The image transferred to the cleaned copper sheet – you can see from the paper peeled away after transfer that not all of it transferred at the edges. See the finished pendant at the bottom of the article.
It worked incredibly well – the image transferred was crisper, thicker and looked much more resilient, see above. I now had to hold my breath while I waited to see if it stayed stuck to the metal during the etching process. I had visions of it dissolving clean off as I watched.
 Take 2 – the initial and cleaned up etch from the better transfer – the edges are crisper and cleaner and the background has remained clean.
 The finished pendant from etch no. 2. I cut the sheet to shape and rounded the corners and polished the flat surface, oxidising it to fill in the texture of the etch and only polishing back the top surface.
I was absolutely delighted with the results – a much cripser etch and the areas around the design had remained predominantly clean. I was so encouraged that I went with a much finer design next, with some lettering, to test how much detail would actually show in a sketch-like original. I haven’t yet oxidised it to see how good it looks finished, but I was incredibly happy with the results, it had worked rather better than I’d expected. This is my parents’ boxer Chelsea and this will go on a keyring for my Mum’s birthday. So I have to hope that she doesn’t read the blog.
 The process to get an image onto metal started with a photograph which was actually the size I have it here. I partially digitised it as a sketch and then hand worked it to bring out more detail and make it a bit more blocky to be more suitable to etch, then it’s reversed and mirrored before printing – where your image is white will be etched, so had I used the middle positive image I would have got a raised Chelsea with an etched away background – I wanted the image etching, so had to make a negative and then mirror it to ensure she faced the right way and the writing wasn’t backwards.
 The initial resist transferred to the sheet metal is on the left – the image area looked clean and detailed and my transfer paper was largely clean, which is a good sign. I blocked over the plain areas I wanted keeping clean with a mask of hand cut duct tape to be on the safe side. The resulting etch on the right – it too will be oxidised to show the detail, which I hope will look like a sketch on the metal.
 The finished piece, oxidised and the flat polished surface partially polished back and hanging froma heavy weight hand made oval jump ring.
My head is now fit to burst with the ideas tumbling over each other in there waiting to see the light. I just need to fine tune my workflow to make it more economic to make things to sell, the method at the moment is a little too work intensive to be profitable.
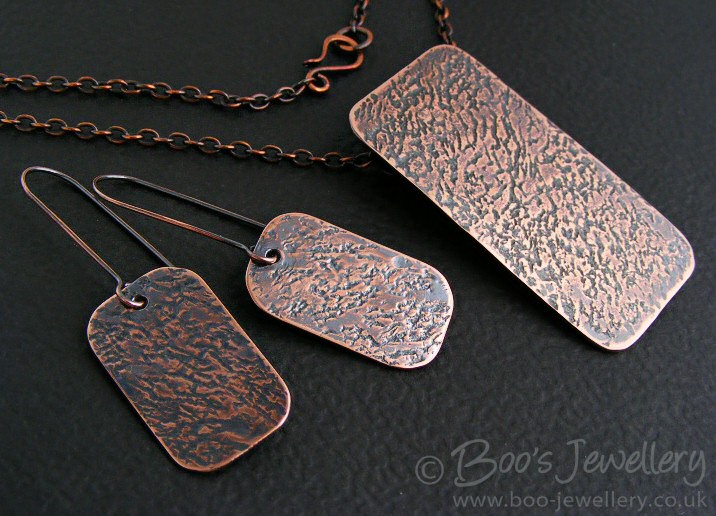
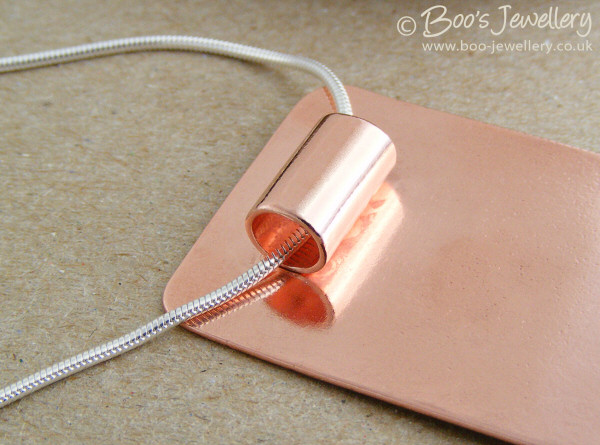
These are a couple of smaller pendants using the abstract designs I created by coarsely halftoning some photographs – one using a square ‘dot’ and the other was a linear pattern – the resist for the square one is shown above. I’ve finished them simply, with a very chunky oval shaped jump ring to keep the costs down by reducing the amount of work I do on them (they’re already quite labour intensive) – I like the tube bails I’ve used recently, but these add to the time I spend on a piece.