Work in Progress (WIP):
There has been much discussion recently in various on-line venues – and directly with customers – about making buyers aware just how much you put into a piece to distinguish them from ‘assembled from components’ or mass produced items. Sometimes it isn’t obvious from item descriptions which of these it is and your only guide may be the price. It’s important to me that buyers should be able to make that distinction and make an informed purchasing decision.
 The finished bracelet with my own toggle clasp – the design and engineering of which was quite a learning process.Please click the photographs to see a larger version of them.
The idea of seeing pieces part-made and in progress, or studio photographs, appealed to buyers – to reinforce the wholly hand crafted nature of the work. Those that choose to buy hand-crafted work rather than off the peg on the high street do so because they like to feel a direct connection with the artisan that made their new piece. They seemingly enjoy getting to know the artist and about their work and are fascinated with the work that goes into making a piece directly from scratch from raw materials and enjoy seeing in-progress photographs, something I aim to do more of in future.
As someone who tries to make every element of a piece of jewellery myself – from earwires, headpins and clasps – it is important to me that potential buyers are aware of the many stages of this process and how this informs the price of a piece.
Hence I decided to chronicle this particular project in photographs as I worked. I did an earlier blog on bringing a piece of metal to life, but only retrospectively, without the benefit of in-progress photos, but in view of recent discussions, I took photos as I worked on this particular piece.
I actually made two bracelets largely the same at the same time, so the photos are from both pieces and the first incarnation of it had a different toggle design. But as often happens when working on a piece, the design gradually evolves as practical considerations are addressed and problems overcome. Sometimes you can only hone a design once it takes on 3 dimensions – you need to have it in your hands in solid form to test what works – and just as often, what doesn’t. In this case, the first toggle looked pretty, but didn’t work as well as I hoped. More of that below.
 The links and clasp sections are hand formed and sawn from raw wire stock.
 The links start life coiled as rings, sawn apart, cleaned and closed ready to solder closed. After soldering, they must be pickle-cleaned to remove the firescale and molten flux.
 The circular rings are then hand shaped to the long ovals I chose for this design.
 The links start as circular, are stretched to ovals, then the sides straightened a little more.
 The links of the bracelet are hammered slightly for both stability of the metal and appearance.
 The chain is assembled and all the links soldered closed.
 The final stage is hand filing, shaping and polishing, for which there is no substitute for getting your hands dirty. Despite the messiness of it, it’s a very satisfying process and one that I don’t mind. It’s lovely to see the beauty and colour of the metal emerge after seeing how rough it looks in progress.
 As you can see above from the Work In Progress (WIP) photos, there are many stages to creating something of this nature from raw materials, especially if you want to make something unique and ensure that all components balance and work well together and give rise to a piece that will withstand wear and last for many years to come.
The design of the toggle:
Designing a piece isn’t just about drawing pretty sketches of the finished article – of which I do plenty and have pages of ideas yet to see metal – it’s about engineering too. A piece of jewellery has to be attractive, but work and be wearable in a practical sense too. You don’t want sections snagging on clothing, earrings trapping hair behind a loose edge and functional areas like clasps – especially on bracelets – must be fasten-able with one hand and not come undone in wear.
So the lion’s share of my initial time on this bracelet was in designing the clasp. I wanted to make my own toggle from scratch – not just use a bought component – and yet it has to sit easily with the design of the rest of the piece – you want shapes to mirror the design and be balanced with the piece as a whole – the clasp shouldn’t be an afterthought, but an integral and important aspect of the design. My scrap pile is a little larger as a result of this particular design process. Sometimes your first idea is spot on, sometimes they need a lot of snagging and trial and error. Hopefully that effort will result in a better final result for your customer.
 A clasp has to be an integral part of the design, not an afterthought. I try to match my closures to the style and weight of the piece, to reflect the shapes and yet work well in a practical sense too.
 For this copper long link chain bracelet, I used the basic toggle design principle from a project in a book I have from the library and when finished, it simply came undone too easily in wear and clearly that was unacceptable. I did wonder if it might be like the old joke about how many rolls of wallpaper a neighbour said he used to decorate his lounge – “yes, I had 3 rolls left over too” – I wondered if I told the designer that it didn’t work, they’d say “no, mine didn’t work either”.
 I liked how this toggle looked, but it simply didn’t work well in practice. It fastened well, but wouldn’t stay that way!
Even commercially made toggles don’t always work, I have several that I’ve bought that are either too tight or fiddly to fasten one-handed, or come undone too easily and cause the bracelet to fall off. So toggle design is seemingly especially critical in terms of size and shapes – where the hooks and rings I do more often are much more forgiving. I found very little information about the basic engineering of a toggle to guide me, tutorials either give exact sizes for the particular design, or skirt the issue entirely and must give rise to a lot of unsuccessful results and frustrated makers.
 In this case, I wanted the toggle to reflect the long links of the chain, but in practical terms, it had to be wide enough to let the toggle bar and the first links of the chain adjacent to it to pass through to fasten it, so in order to make it wide enough to allow this, it would have needed to be much longer than it is shown if I wanted to keep the same proportions as the chain links. Which would then require the toggle bar to be much longer too in proportion – longer than I decided would look nice or be comfortable to wear. So I compromised on widening the loop slightly in order to keep it to a more modest loop length and to balance overall with the weight of the rest of the chain.
The toggle bar itself needed much consideration too. It needs to sit nicely against the loop, hopefully as flat as possible, but also be easy to manipulate when fastening one-handed – and remain securely fastened and also securely attached to the chain itself.

So this too went through several incarnations. In this instance, I worked on several versions of both elements of the clasp until I was entirely satisfied they were just what I wanted – and now that I’ve done that process, it’s a design I will no doubt use often – and an important stage for me is in taking detailed notes and measurements as I work for future reference. But they are vitally important learning processes and sometimes you have to get it wrong to learn why it doesn’t work and to learn how to overcome those important practical considerations. I spent more time on this project than I’d intended, but the learning process was well worth it to me and I hope it reflects in the quality of the final result.
I think I prefer this sort of practical lesson to just being told how to do it – one of the advantages of being entirely self-taught and working independently.
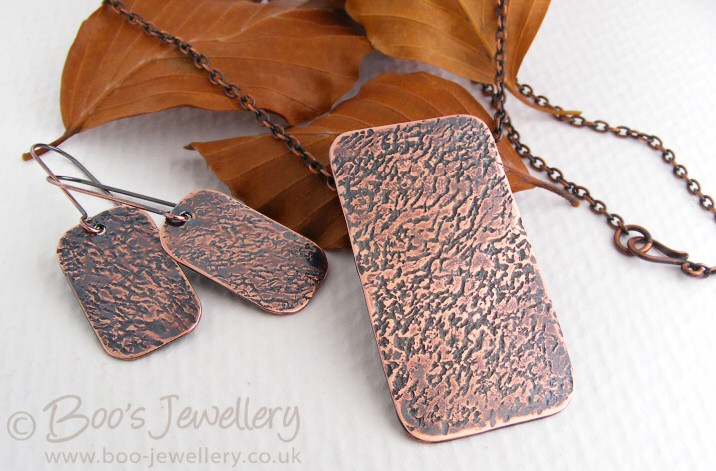 I gave the upper surfaces a high degree of hand polished shine so that once oxidised, it would take on a nice gunmetal style sheen. I polished the oxidisation back a little from the surface to reveal the texture.
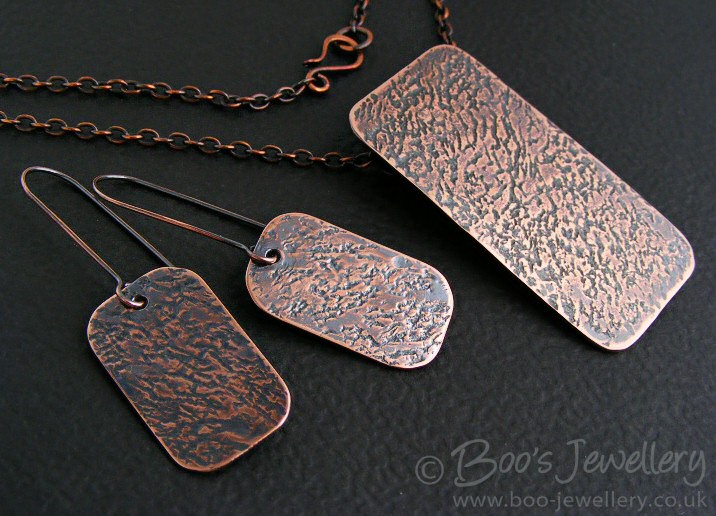 I’d originally intended soldering solid earwire hooks to the back of the earring pieces, but decided at their size, they might hang a little low and without articulation. Coming up to winter when ladies are more likely to wear coats and scarves, it might cause them to get pushed upwards during wear, so I went for a long stright drop earwire through a drilled hole instead.
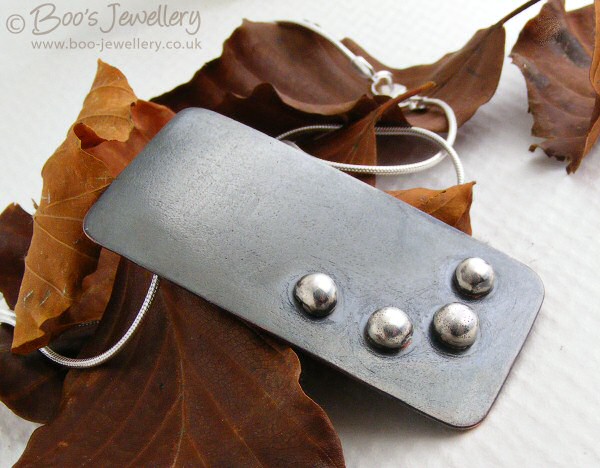
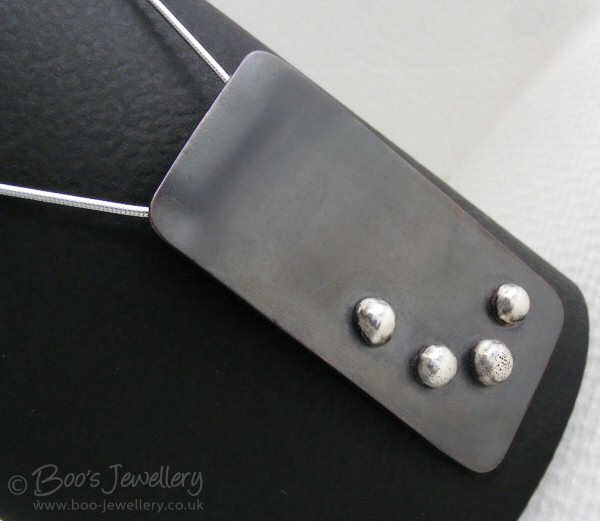 This pendant too has a tube bail soldered on the back and I think I’ll probably wear it on my Sterling silver snake chain. I like the simple contemporary lines of it and hope to apply what I learnt in making this one to something similar to sell.
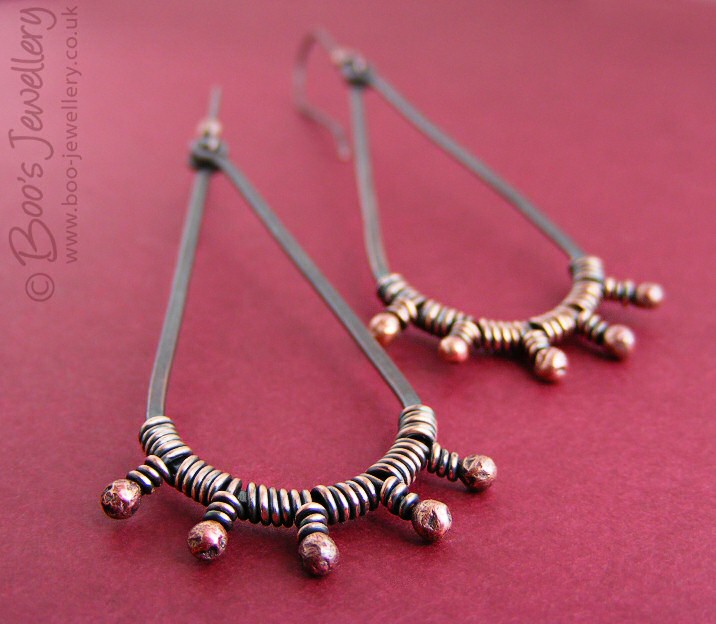 I’ve oxidised the earrings and then polished back just the wrapped areas to accent the texture there. The hammered teardrop loops have been left dark and smooth to contrast the textured details at the bottom. The buds were left a rosy copper and whilst these aren’t as red as some I’ve done, they still have a pink glow to them. I’ve hung them from wrapped earwires to mirror the texture.


