This subject comes up often in forum discussions and the way I do things and my thought processes is seemingly rather different from most other sellers. I include the shipping costs in the displayed prices of my jewellery pieces for sale. And this is why.
Be it out of laziness, or I’d prefer to think, ease of working, I use a very simplified method that I feel sure works well for me – I’ve done it this way for many years of on-line selling and am happy to continue with it. I’m not talking here about pricing formulas for individual items based on materials and time, that is well covered on-line already, but rather the methodology and thinking of what to include and where in the calculations – this is very much my personal approach. For the scope of this blog, I am only concerning myself with retail sales direct to customers – wholesale pricing is a whole different can of worms.
Many sellers are hobbyists and aren’t as concerned with covering every business expenditure, but some of us rely on the income as an important part, if not all, of our earnings. In my case, making and selling jewellery is one of the things I do professionally to put food on the table. My discussion is therefore on the assumption of a more business-footing approach of this nature.
I sell jewellery in several real world and on-line venues and each one has its own inherent costs. Over time and with experience, I feel fairly confident in saying that no matter where I sell a piece, it costs me a sum of money just to complete that transaction – to even put myself in a position where someone might buy it has cost implications. The process of making the work available and hopefully completing a transaction – in any venue – therefore costs money – in some cases it will even be more than the raw materials used for the piece.
 In some cases, the packaging and costs of selling will be more than the raw materials.
For me, it is important to consider the direct costs of actually selling the piece alongside the actual materials used to make it – I suspect that not as many sellers as should, actually do this. The less obvious costs of presentation materials and packaging can seriously mount up if you want to make your sold items look good and arrive safely and it’s just as important that these costs are accounted for as the direct materials in the jewellery.
As an exercise some time ago I did actually work through the individual costs of selling in different venues, accounting for every sheet of tissue paper, adhesive tape, labels, business cards and transaction fees – along with an average, per item sold, amount I’d paid over a period of time for postage (my average orders are for 2-3 items). I wrote a list of the direct materials used and other direct costs for selling a particular example piece in different venues – from personal callers to on-line venues like Etsy.
The costs were surprisingly similar – or at least close enough for me to be happy to average them and use this calculation across all venues, for consistent pricing. I often see discussions on-line of different pricing policies, say for craft fairs as opposed to on-line. I don’t feel as though offering items at different prices in different venues is especially polite to customers – I’ve always felt that if I did this, it would somehow come back to bite me. If at a particular venue you feel you can secure a sale or multiple purchase by offering your customer a financial incentive, then you still have that option available on a per-sale basis – but only starting from the position of ensuring your costs are already covered secures you this potential option.
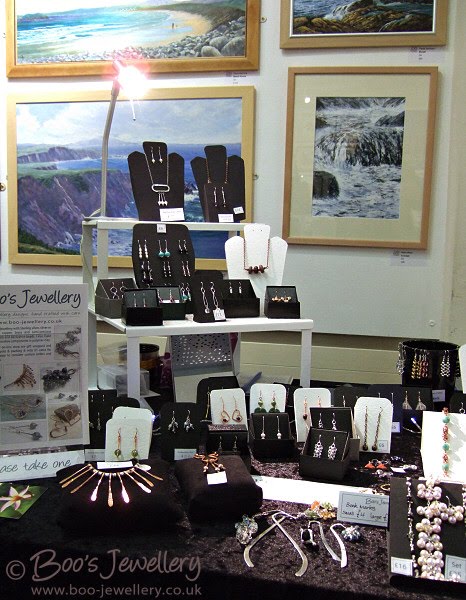
 At craft fairs you have a multitude of costs to cover, although some of them can be attributed for marketing purposes.
All venues have their own costs:
If I sell to personal callers, this generally involves more of my time, possibly refreshments and they may write a personal cheque which needs to be banked and incurs fees – along with gift wrapping and carrying bags. At craft fairs I have table fees, liability insurance, display materials, parking, petrol, business cards and leaflets and carrier bags. When I sell mail order from my own site I have site and domain hosting fees, PayPal fees, presentation packing, thank you notes, packing materials and mailing cartons and postage. To sell on other venues like Etsy, I have their transaction fees (usually a combination of listing fee and percentage of the sale price) in place of my own web site costs.
I also know from experience that my average sale is for more than one item and at real-world venues like craft fairs, time spent with a customer, or handing out leaflets, won’t always secure a sale that day – but may well do so at some time in the future – so some of those costs would be considered as marketing too.
So as you can see, each venue has costs that balance out surprisingly evenly on a per-item-sold basis. When I make a piece and am working out the selling price, my price comprises three main elements – each of which is arrived at through other calculations:
- The materials directly used to make the piece;
- an hourly rate for the time taken to make it;
- and the direct costs of selling it.
The materials I simply work out depending on what I paid for them and the amount used – I round them up a little to allow for wastage and for incidental materials like polishing materials and solder. My hourly rate is arrived at by determining how much I want to earn, how many hours I will work on this aspect of my business and any direct overheads this aspect of my business incurs, like the jewellery specific insurance policy I hold, tool repair and replacement, a share of utilities and indirect costs like marketing.
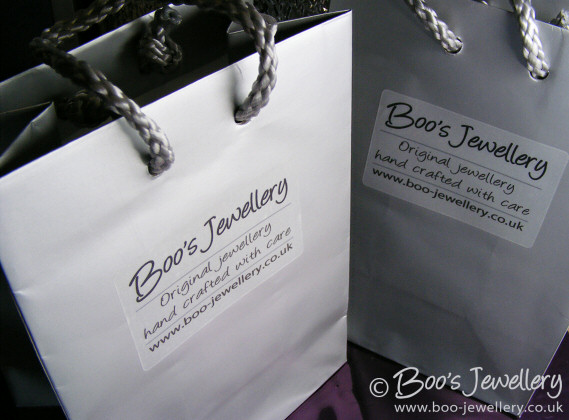
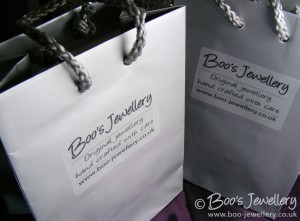 For personal callers and craft fair sales I use branded gift bags.
The direct costs of selling are therefore an averaged amount I add to every piece comprising likely fees, some for wrapping materials and packaging, postage etc. I also include a small rounding up amount for self-insurance. Some orders I might lose a little, some I might gain. Over a year it works out incredibly close. If someone orders several items on-line, I have the capacity to upgrade to a premier postage service at no extra cost to them – or if that’s not suitable for them, refund any over-payment – I’ve done both several times.
The postal service in the UK does not cover for losses of jewellery sent through regular post, recommending the much more expensive Special Delivery for such items. I therefore decide on a per order basis which is more appropriate – the expense of the upgraded system, or to send at my own risk? I consequently send most items in the regular post, saving the customers the higher postage fees of routinely using Special Delivery, but bearing the risk of loss myself – which legally is my risk to bear. On the very odd occasion where something does go adrift, I have a small virtual fund available to cover the loss. I do offer Special Delivery (and international equivalents) as an upgrade option if the customer prefers the security of a guaranteed delivery date or tracked service.
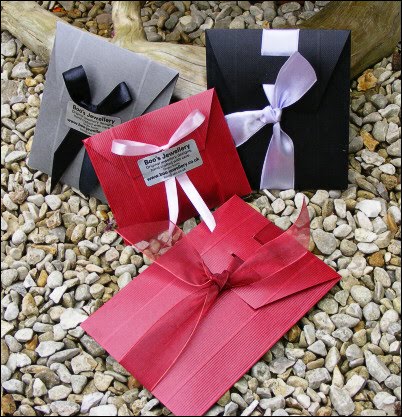
 My jewellery pieces are wrapped in tissue paper and then placed in my own hand made gift envelopes and sealed with ribbon.
As a piece is completed, I work out a price and place a price tag on the piece. This is therefore the price of that piece no matter where I sell it, as the costs of doing so are already covered.
It is a policy which receives a slightly mixed reaction – customers report that they love the ease of knowing that the price they see on the page is what they’re actually going to pay – they don’t have to worry about cumulative shipping costs if they add several items to their basket or trying to dig through the site to see what the cost implications are for shipping methods available. This transparency of my system is well-received by customers.
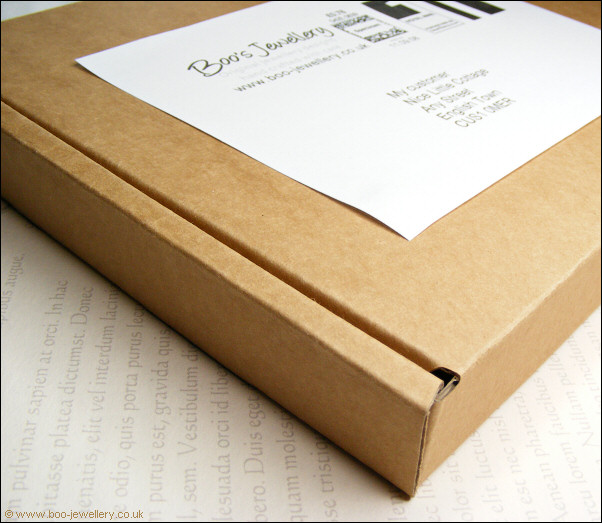
 I am able to keep postage costs down by using postal cartons that protect the work very well and come inside the large letter pricing band.
But it has been questioned (by other sellers) that not knowing what hidden costs are allowed for shipping, if they’d potentially be over-paying. In the early days, I used a shipping-inclusive price for all buyers; domestic and overseas and this was certainly questioned – domestic customers felt they were subsidising the higher airmail postage costs for my international customers. In reality, I was largely just taking the hit on the overseas sales – in those days there were significantly fewer than now.
But on that reaction, I changed prices to include packaging and domestic-only postage and added a small supplement for overseas buyers for the difference in postage only. This now averages to a little over a pound per item after the PO re-structured their pricing based on size as well as weight – the differential between domestic and overseas mail closed slightly for sellers like me. I also settled on using fixed-sized rigid cartons (shown above) for my orders, that provide really good protection in transit and predictable and lower postage costs. On balance, for me, this is fairer and has worked out well.
This is certainly not a model that will work for everyone, but the consistent size and weight of my work leads to predictable packaging and postage costs that happen to balance out pretty closely to the costs of alternative selling venues. So for me, it makes sense to simplify things and sell at the same price in all venues, which for on-line sales, means that displayed prices include my shipping costs.
 Hammered copper, heavily antiqued, spiral link bracelet.
 I spent a lot of time before we went away for Easter in preparing things to take with me to work on; part-made components to finish, components that I could make into ideas I had etc. – all in case of bad weather and the need to find things to do. I had enough materials with me to make a hundred pieces of jewellery. All I eventually managed was this necklace (with matching earrings) and another pair of earrings. Antiqued copper and green glass.
 I quite liked the smooth look of the back of the antiqued bracelet above, where polishing off the oxidisation, left a pattern of colours on the smooth copper, from bright peach to a deep gunmetal type blue/grey. So I made another version without the hammered texture and will give this the same colour finish. I sometimes just like to enjoy them in their raw state before I give them their final colour.
 A spiral wrapped Botswana agate bracelet in it’s raw copper just-tumbled state, which has since been deeply oxidised and extensively tumbled to a deep gunmetal warm grey.
 Hammered and elongated soldered chain link earrings, with rosy copper molten buds.
 A pendant in progress, which has since been antiqued. I love to see raw shiny just-tumbled copper, so often take WIP photos at this stage. Just because the colour is so pretty.
 Large Serpentine beads spiral wrapped with copper into this bracelet with hand crafted hook and an adjustable chain closure and Aventurine dangle. The copper has been antiqued.